Astral Send - Help:
Watch the Video
Once you have done the Astral Send Setup, the ‘Mail Setup’ in Business Central needs to be configured for Astral Send.
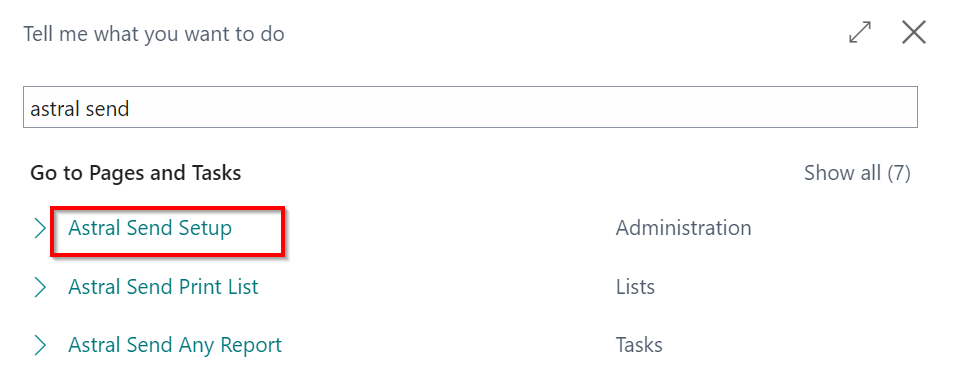
Figure 1 | Astral Sed Setup Page Search
The ‘Astral Send Setup’ screen will open. Click on the ‘Mail Setup’ icon from the Ribbon:
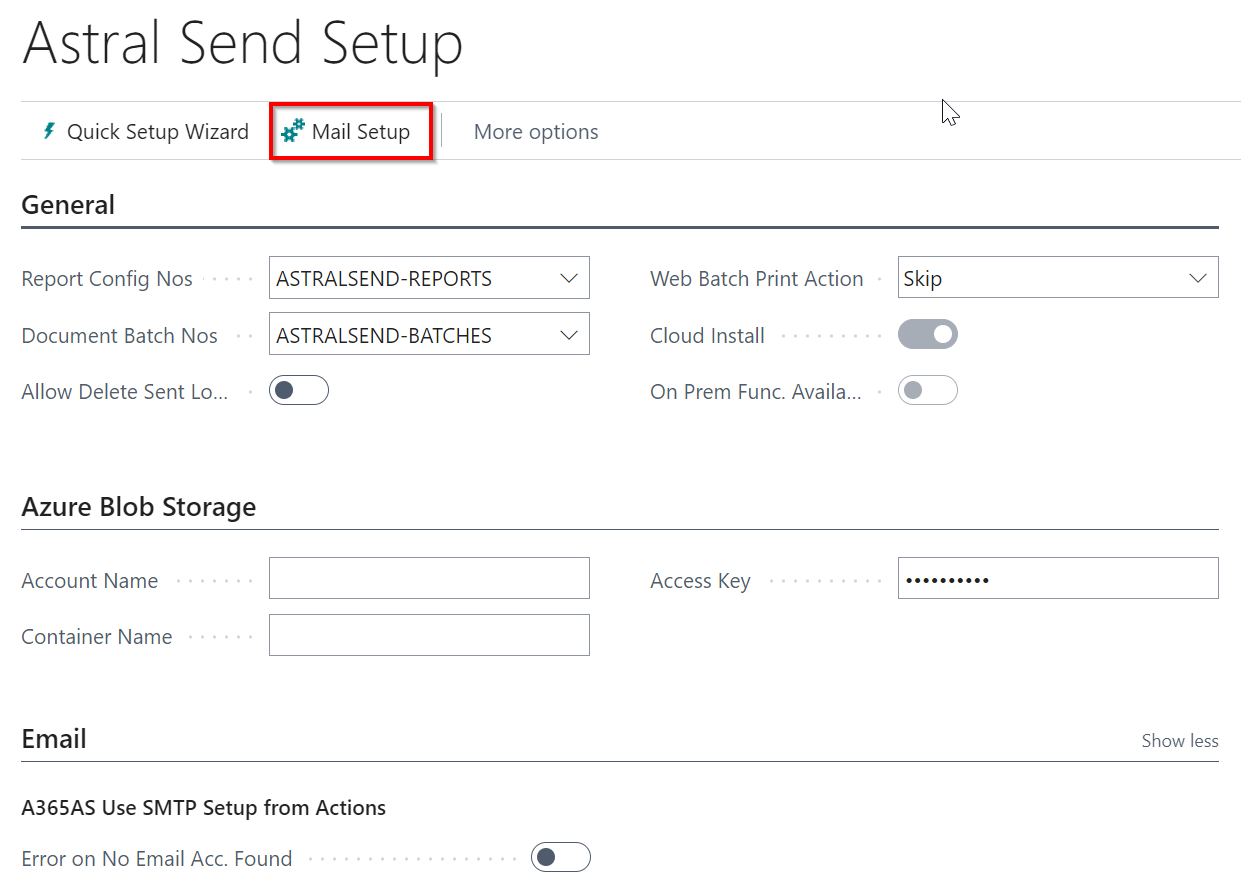
Figure 2 | Astral Sed Setup Page Mail Setup
The ‘Set Up Email’ screen will open , choose ‘Next’ to get started.
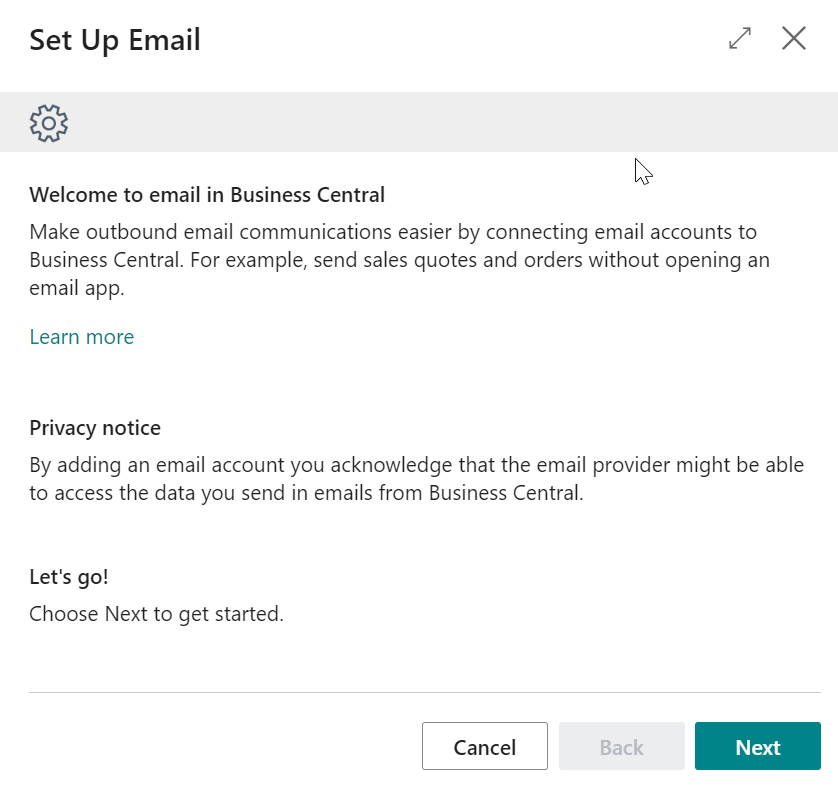
Figure 3 | Set Up Email Page
There are now three options for mail setup:
- The first option ‘Microsoft 365’ uses Microsoft 365 shared mailboxes.
- The second option ‘Current User’ allows users to send emails from their sign in account.
- The third and last option ‘SMTP’ uses SMTP to send emails.
To use ‘Microsoft 365’ option, your administrator must have configured a shared mailbox in Exchange Online before you setup an email account in Business Central.
To create an account using the first option. Select it and click ‘Next’.
Setup Microsoft 365 Email Account page will open.
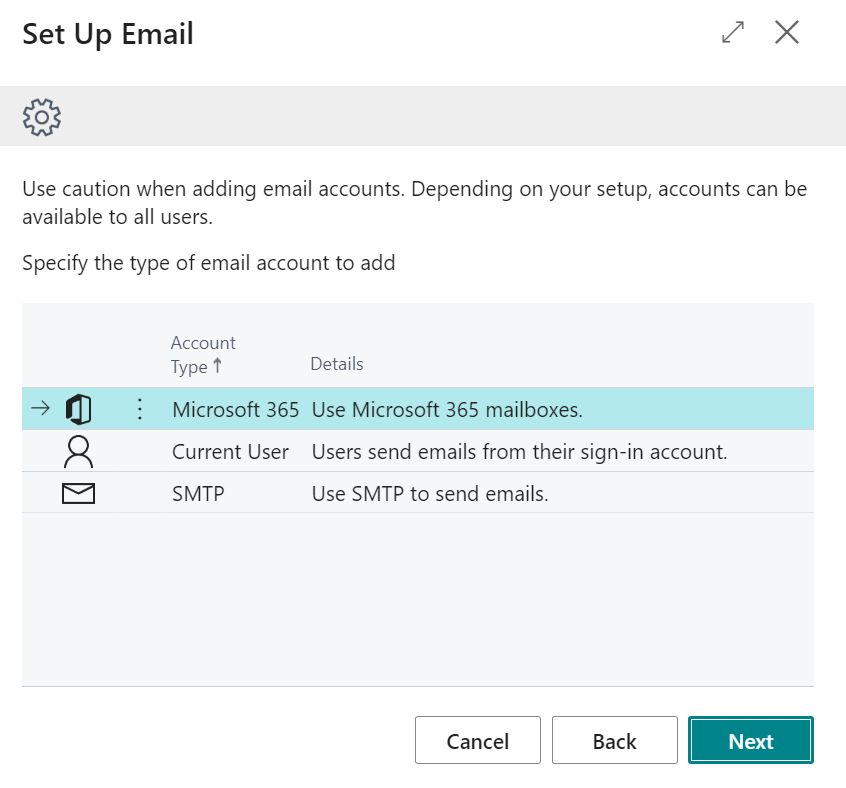
Figure 4 | Mail Set Up Options
Here you will enter shared mailbox details provided by your administrator. Once you have entered the details, click ‘Next’ to go to next page.
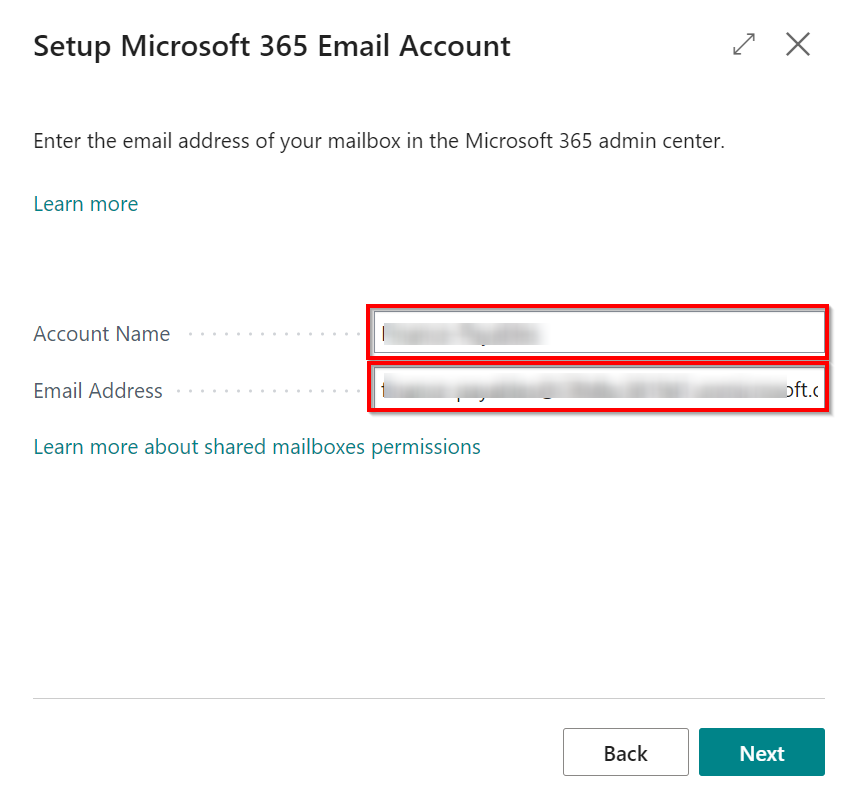
Figure 5 | Setup Microsoft 365 Email Account
To test the account, click on ‘Send Test Email’ and select email to use, then click ‘OK’.

Figure 6 | Send Text Email
A message will be displayed on screen. Click ‘Ok’ then ‘Finish’.
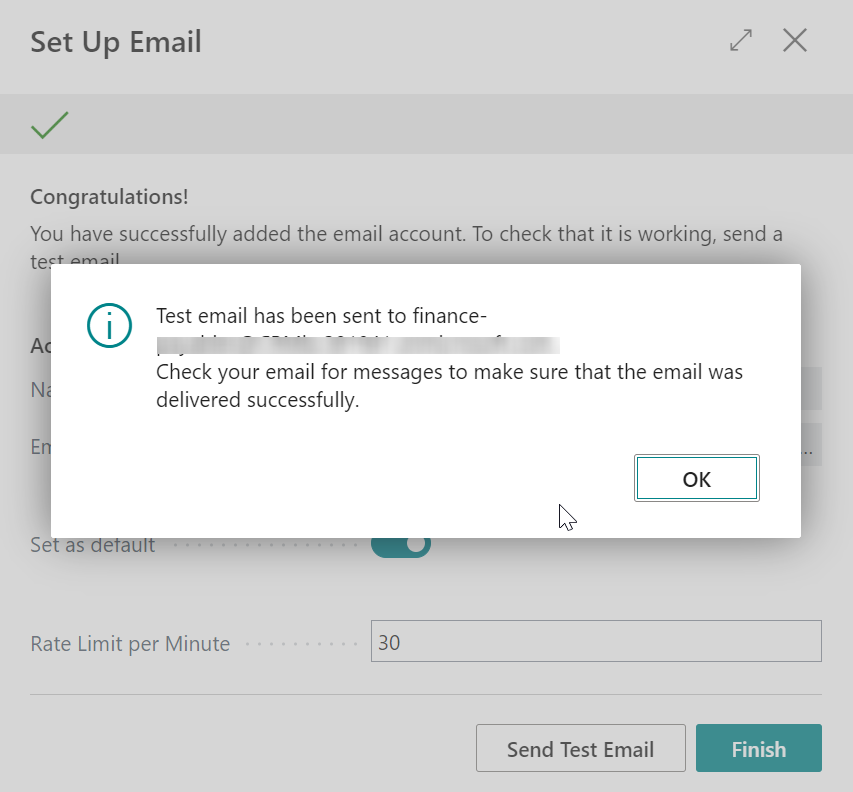
Figure 7 | Confirmation Message