Astral Pay - Help:
A Stripe Terminal reader can be mapped to your Stripe account, allowing in-person payments to be recorded in Stripe and sent to Dynamics 365 BC via Astral Pay. The setup process is explained in more detail in this section but to give a brief overview, start by specifying a Splash Screen for the display screen of your terminal. Next, create a Location to represent the physical location where the terminal will be used, and assign a Splash Screen to this Location. Finally, create the Terminal Record and assign the Terminal to a Location.
Terminal Images
To import the company logo or graphic that will appear on the screen of the Stripe Terminal (also known as a ‘Splash Screen’), click on the Stripe menu and select 'Setup', 'Terminal', 'Terminal Splash Screens':
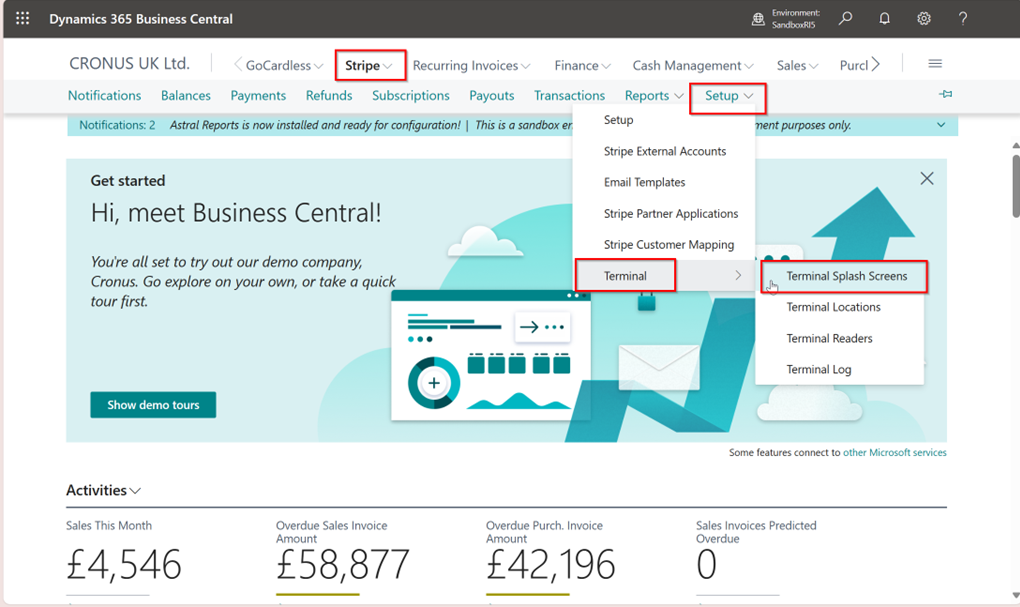
Figure 1 | Navigate to Terminal Splash Screens
This will open the Terminal Images list form. Click on 'New' to create a new Terminal Images record. Give the Terminal Image a 'Code' and 'Name', then click on the 'Actions' button and select Import Image:
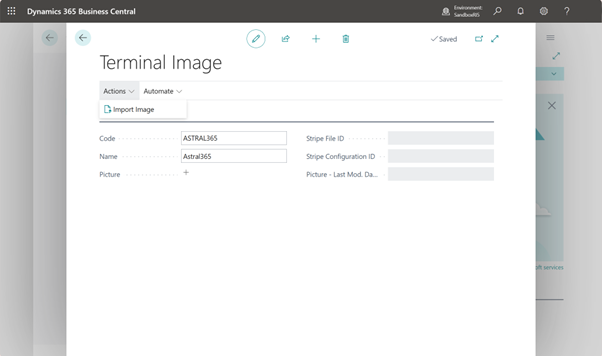
Figure 2 | Terminal Images List
Locate your file, click on 'OK', and the Splash Screen image will be imported into BC for use on the Stripe Terminal.
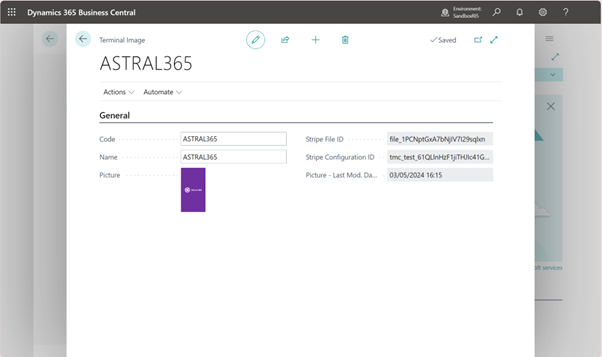
Figure 3 | Splash Screen Image Import
If you choose not to create a Terminal Image Record a standard Stripe image will be used instead.
Terminal Locations
To specify the Location where the Stripe Terminal will be used, click on the Stripe menu and select 'Setup', 'Terminal', 'Terminal Locations':
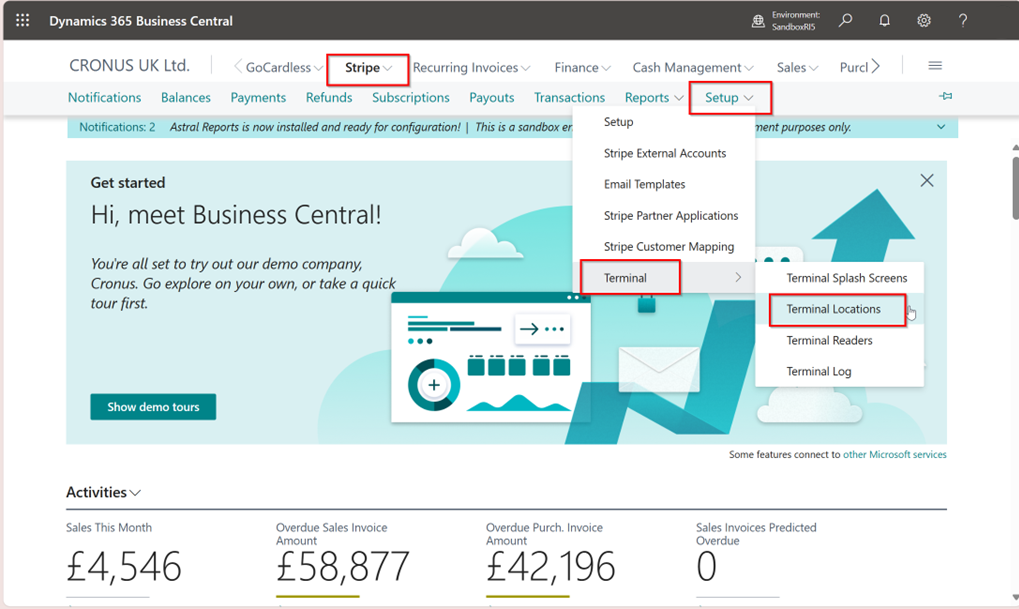
Figure 1 | Navigate to Terminal Locations
This opens the Terminal Locations form. Click on 'Add' to create a new Terminal Location Record. Specify the Terminal Location Name and Address details. In the 'Image' field, you can select the Splash Screen that will appear on the Stripe Terminal device in this location:
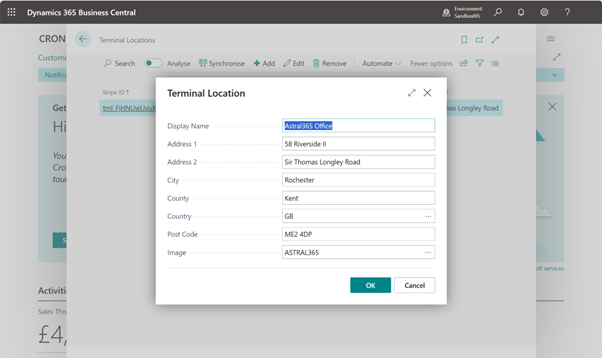
Figure 2 | Terminal Locations Form
Click on 'OK'. When you return to the Terminal Location list form, you will see that the record for this Location has been assigned a 'Stripe ID':
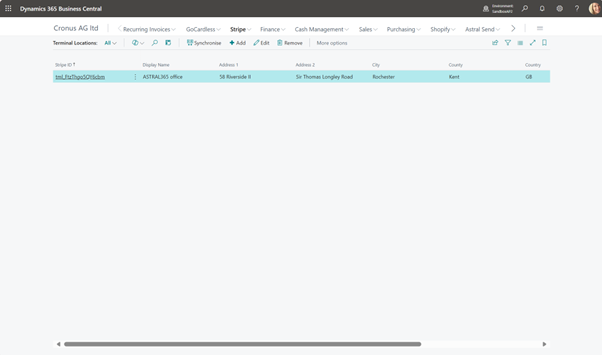
Figure 3 | Terminal Locations List
Terminal Reader
To link your Stripe Terminal Reader to a Location, click on the Stripe menu and select 'Setup', 'Terminal', 'Terminal Readers':
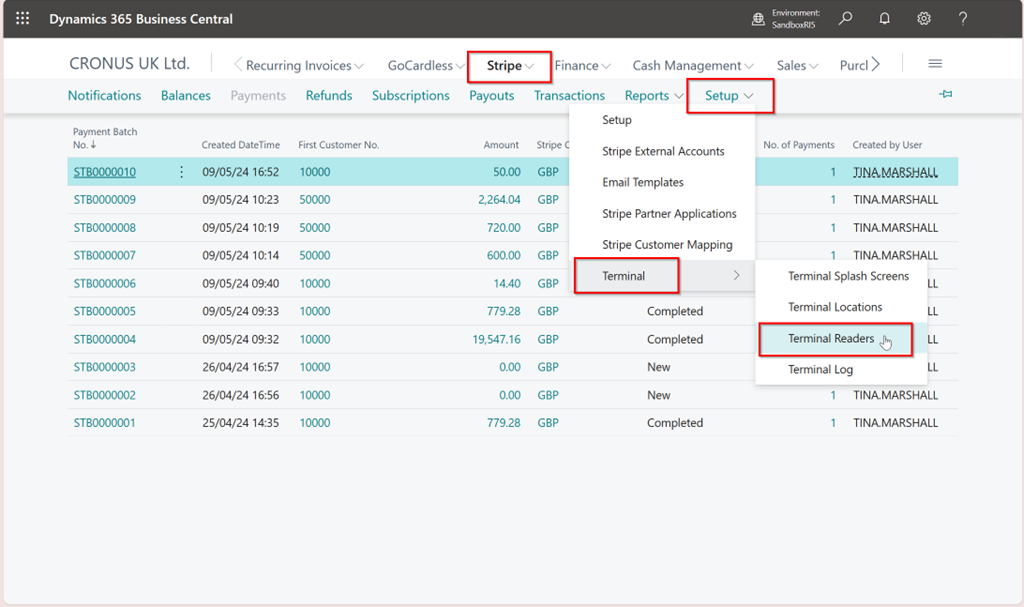
Figure 1 | Navigate to Terminal Readers
Click on ‘Add’ to create a new Terminal Reader record:
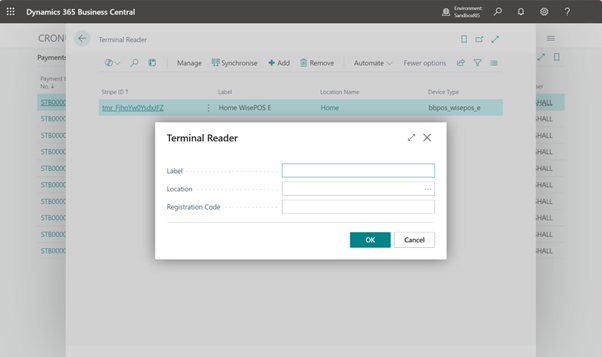
Figure 2 | Terminal Reader Record
Give the Terminal Reader a label, or name, with which to identify it by, and assign it a Location by clicking in the 'Location' field and selecting a Location from the list of options.
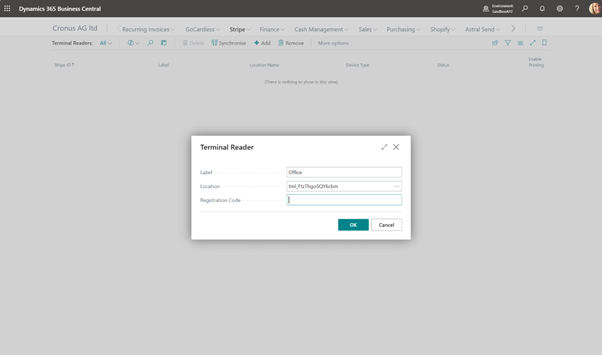
Figure 3 | Terminal Reader Label Infromation
Next, go into the Settings menu on your Stripe Terminal, and select the option to generate a Registration Code (sometimes called a Pairing Code). Enter this code in the 'Registration Code' field and click 'OK'. Stripe will now associate this Terminal with the Location listed above.